Explore four stages of the design workflow at your own pace.
Real product screenshots from version 1.0.36. This is a visual walkthrough, not a video or an interactive copy of the software.
Step 1 of 4
Start with construction
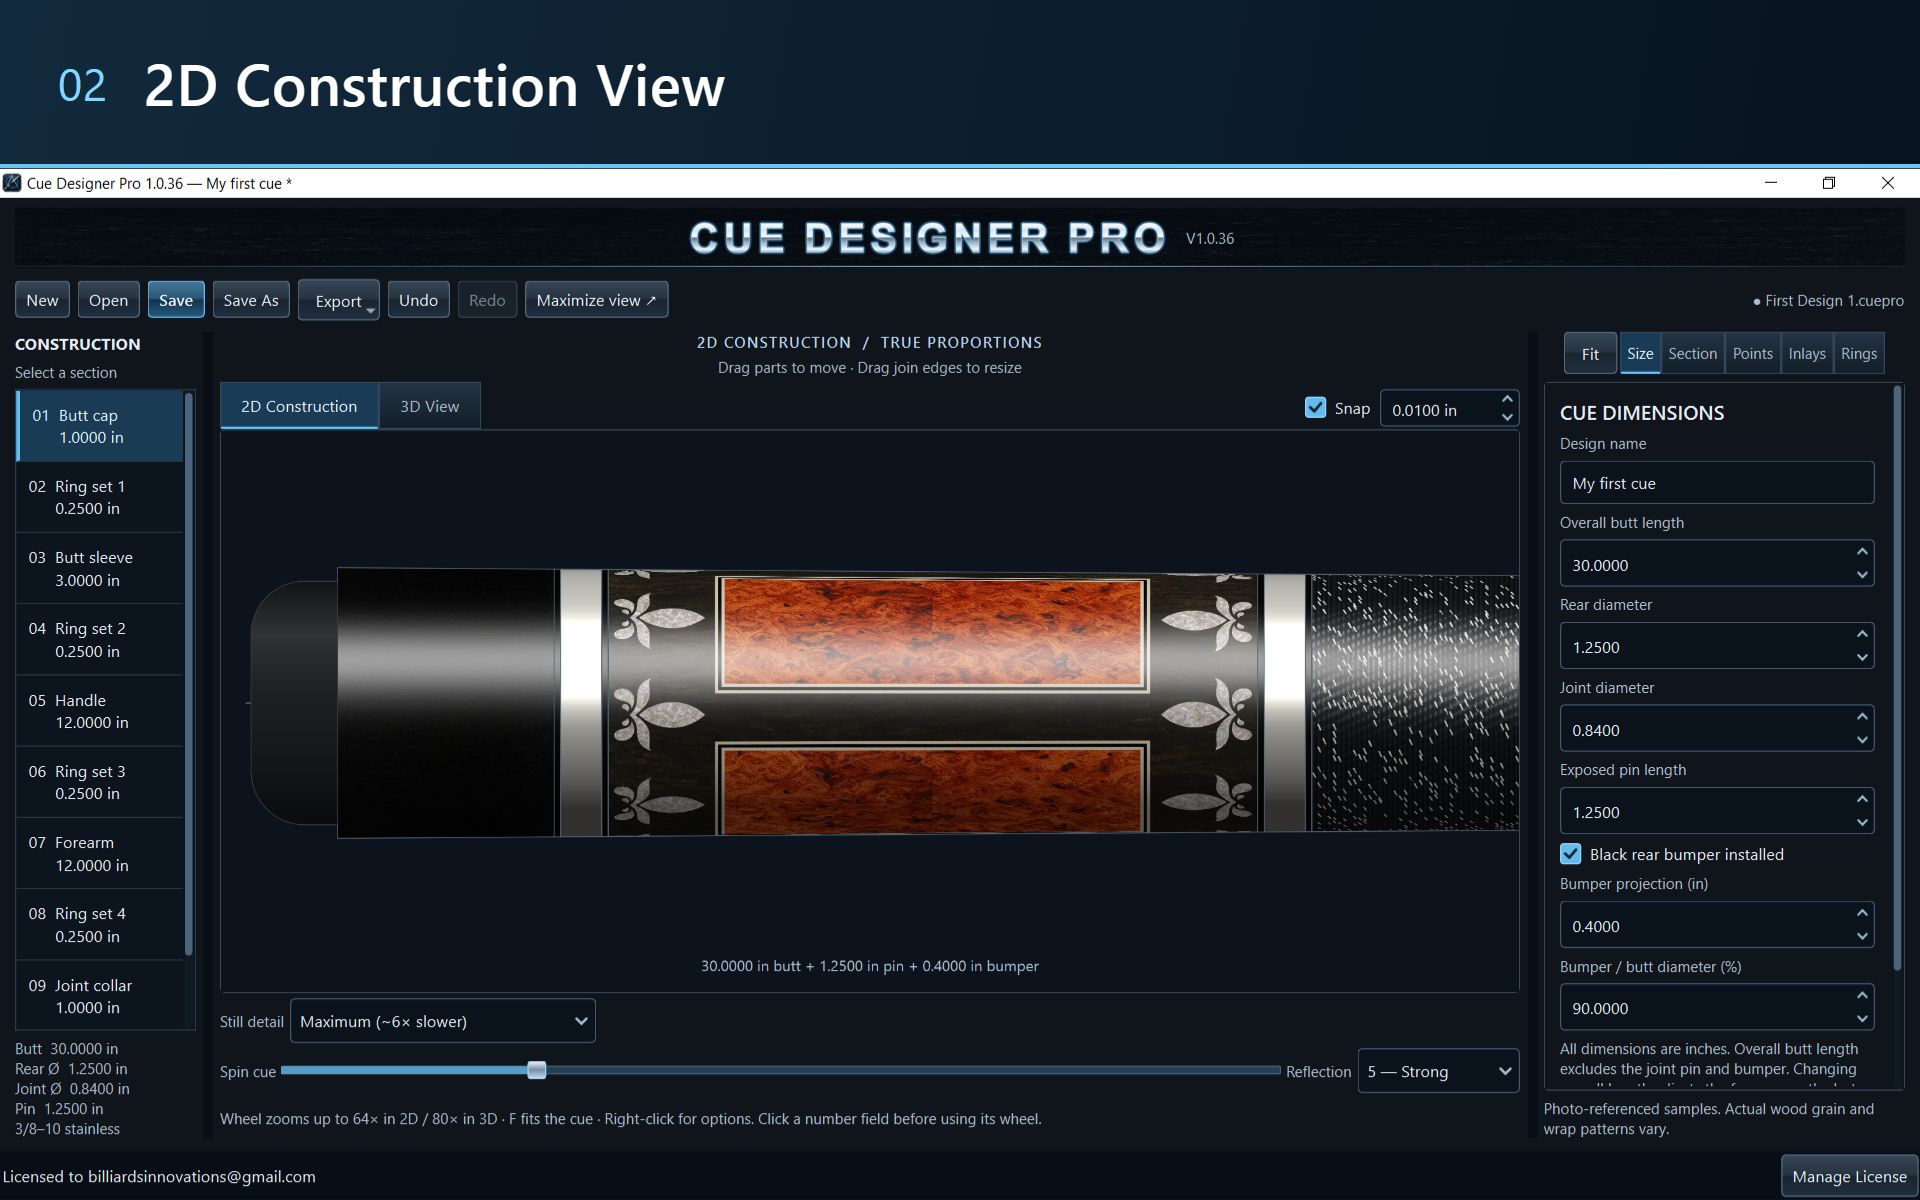
In the 2D Construction view, work through the cue sections listed on the left and review dimensions on the right. This example shows the butt sleeve and its surrounding details.
Tap the screenshot to inspect it at full size.
Step 2 of 4
Explore materials
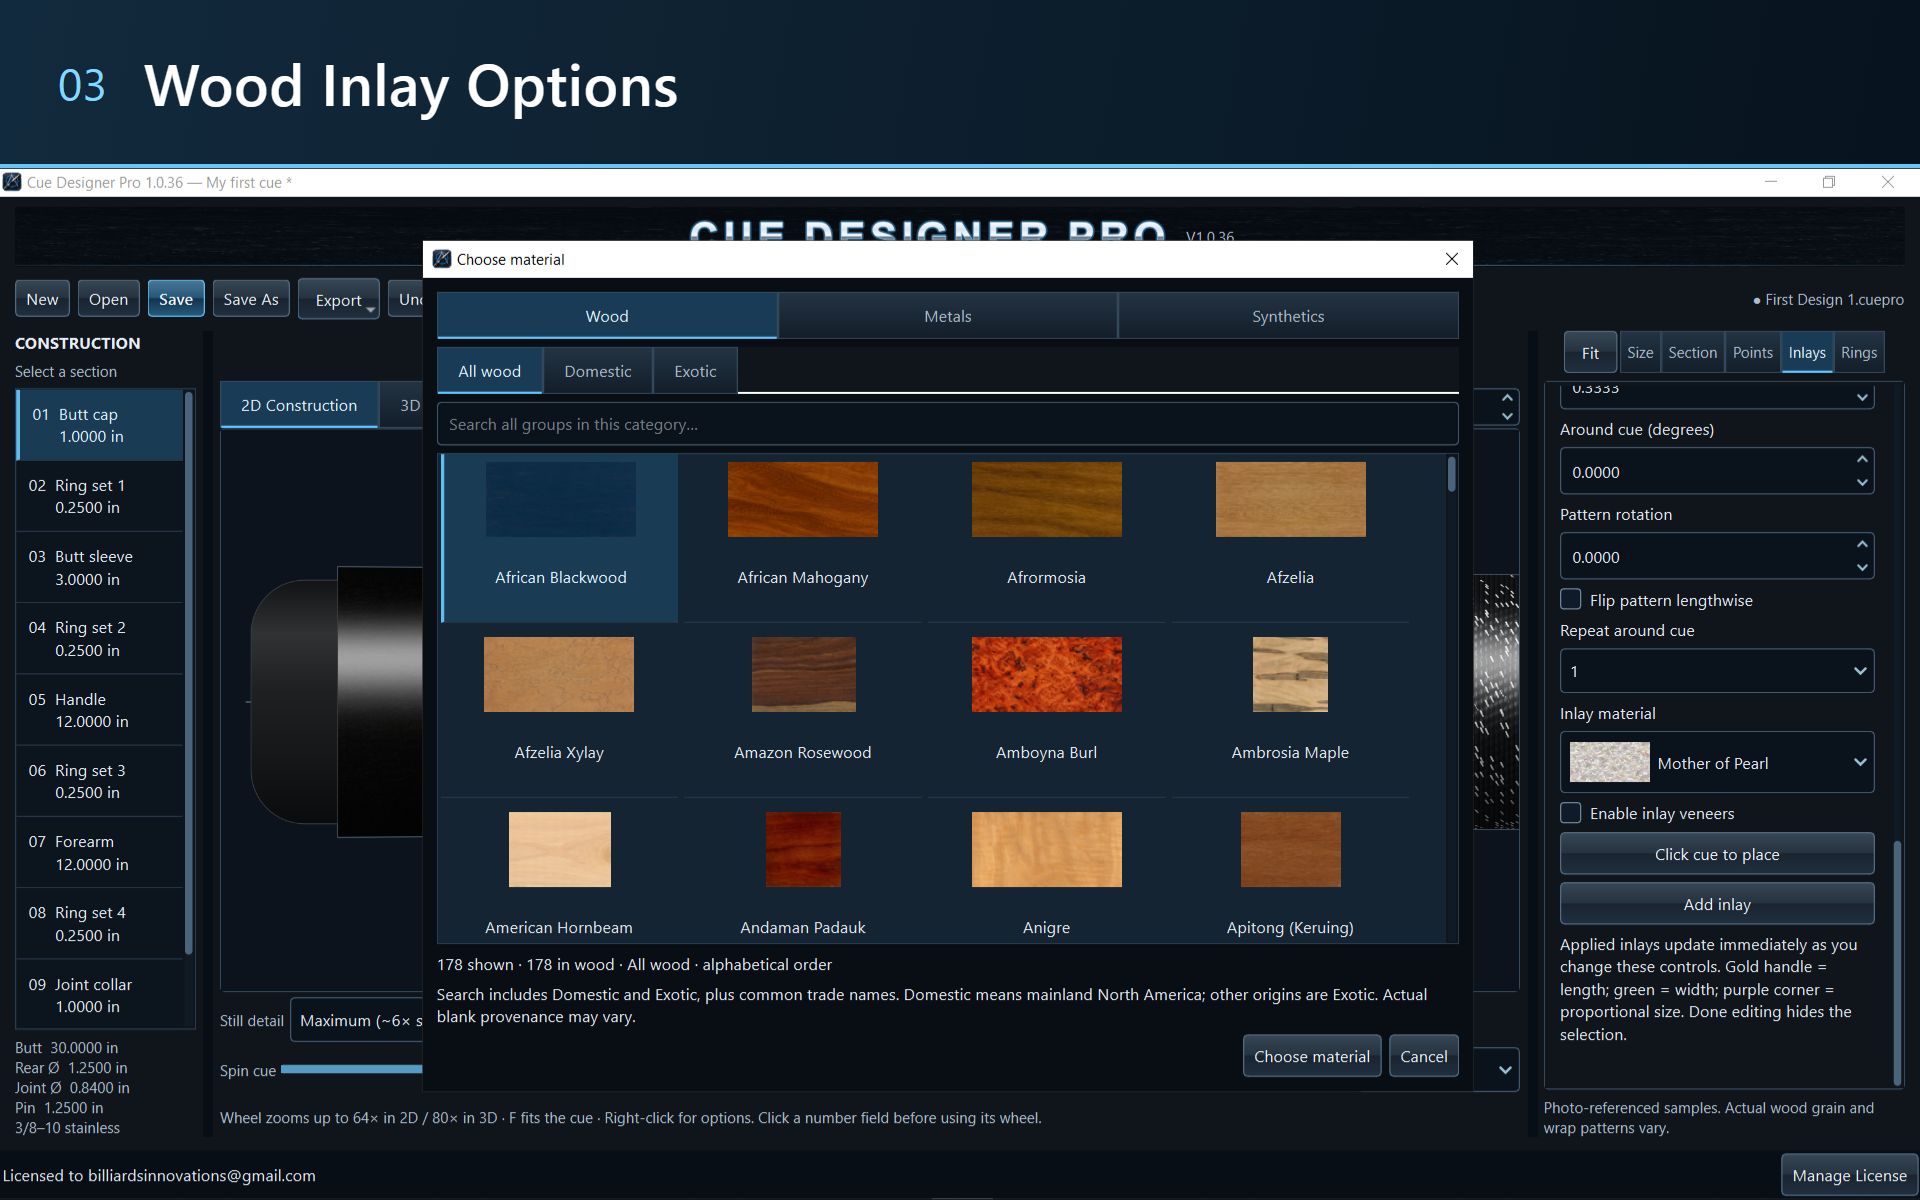
Compare wood appearances in the material chooser. The screenshot shows wood categories and samples alongside the inlay controls. Actual wood grain varies.
Tap the screenshot to inspect it at full size.
Step 3 of 4
Review the design in 3D
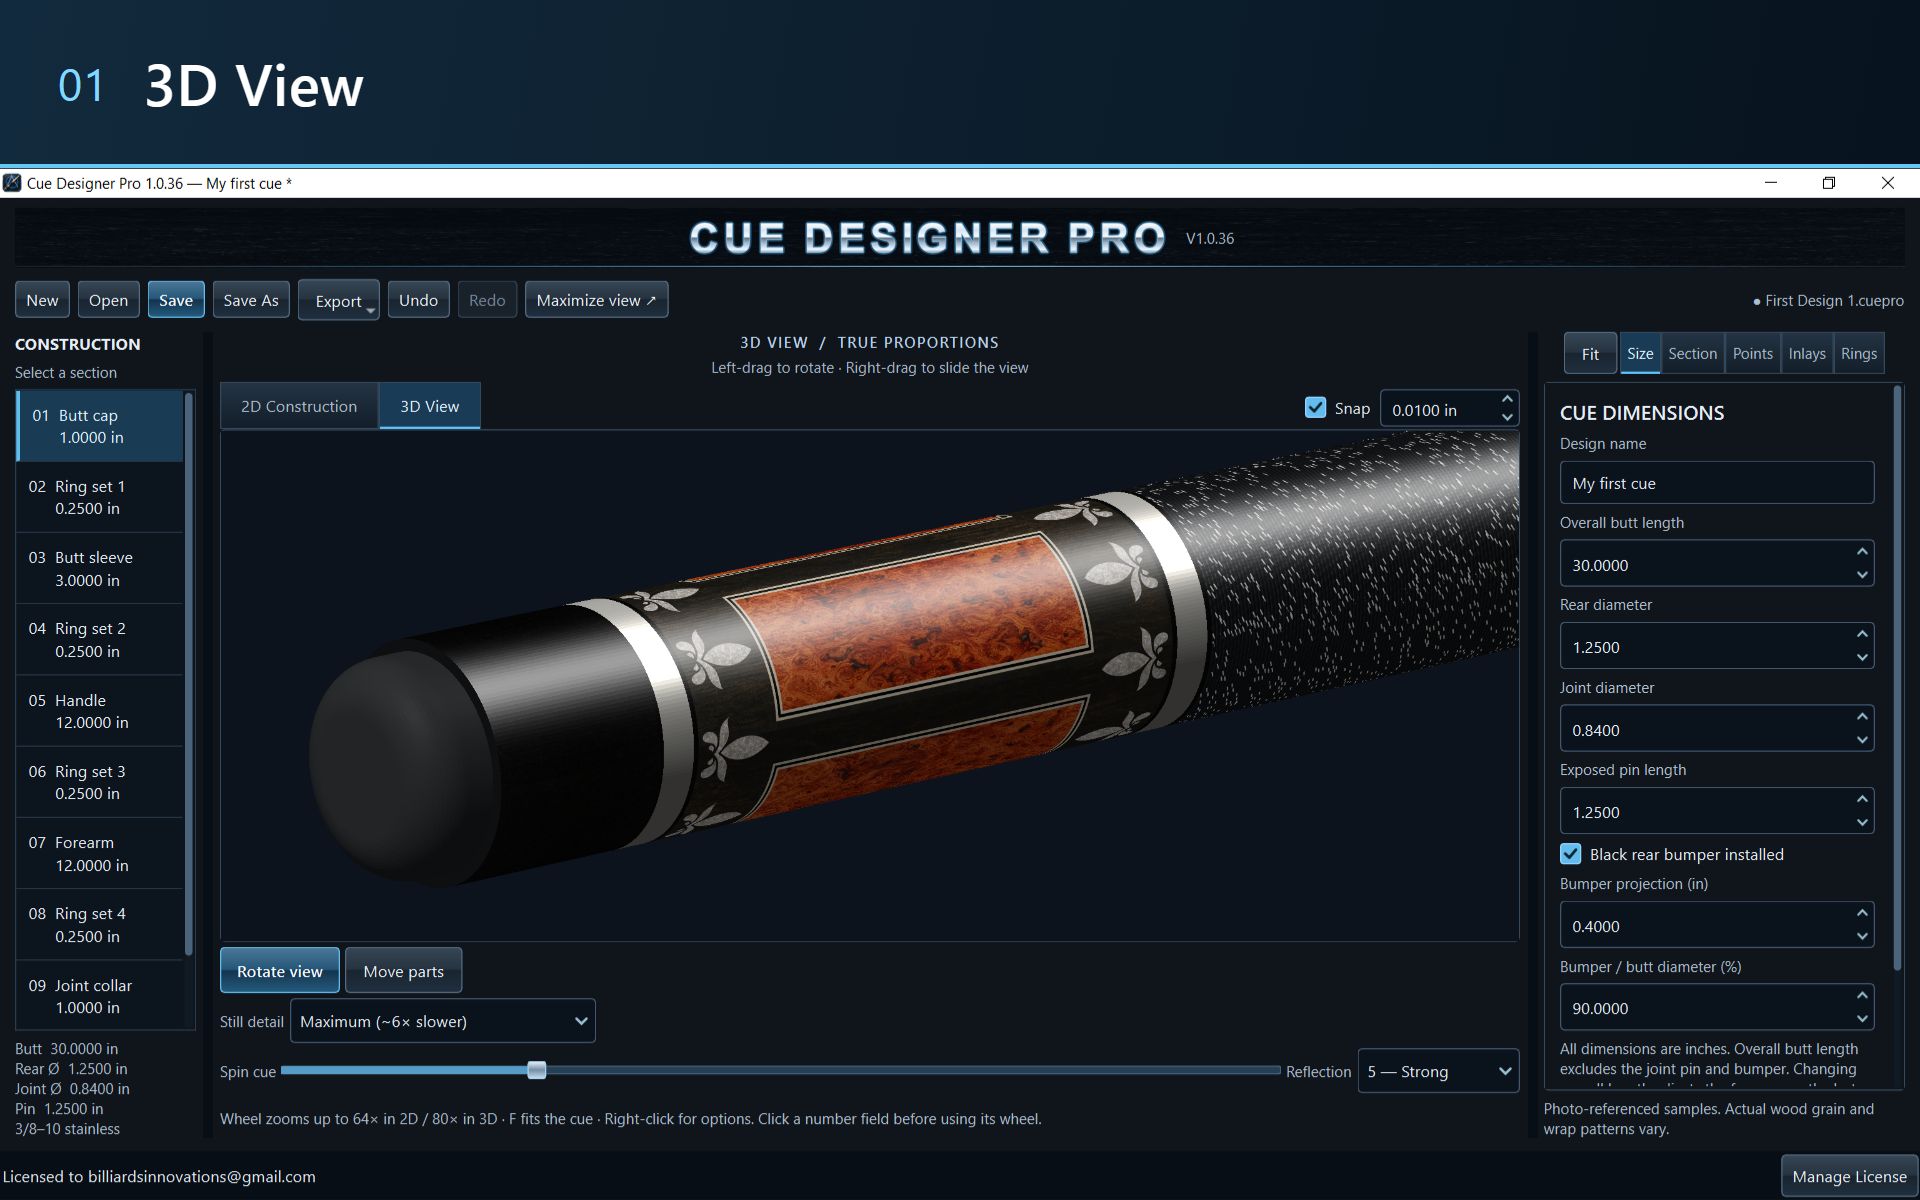
The 3D View brings the materials, rings, and decorative details together. In the software, left-drag rotates the view and right-drag slides it.
Tap the screenshot to inspect it at full size.
Step 4 of 4
Save your concept
Use Save or Save As in the software toolbar to keep your work. Give variations descriptive names so you can compare your ideas later. This screenshot shows where those controls sit.
Tap the screenshot to inspect it at full size.
Step 1 of 4
Ready to explore further?
Follow the first-design guide, or review the product and release information.